Tuesday, September 29, 2015

National Coffee Day! Painting with Coffee!


Greetings, folks! I haven't been able to blog at all since the new school year started. I am now teaching art at a Catholic high school in Edison, NJ (and so far I love it! My students rock!).

This morning while I was making my 1-hour (yep) commute to work, I heard on the radio that today is National Coffee Day. Painting with coffee is something I discovered on Pinterest last year and never got to do with my students at RMHS.

Armed with excitement, a prep 2nd period, and free coffee for teachers provided in the cafeteria each morning, I whipped up a quick Google Slides presentation about painting with coffee. My slideshow featured a coffee-ring-stain portrait by Malaysian artist Red Hong Yi and a video of Mary Doodles painting a picture of a penguin with coffee. I also explained what a resist is, because I included a series of three coffee paintings that made use of wax resist.

Red Hong Yi making a coffee portrait
Most of my students were still finishing their previous assignment (sketchnotes about sketchnotes... so meta!) but a few got to try out painting with coffee, and more are looking forward to trying it on our next Free Choice Friday.


I didn't take too many pictures today, but hopefully I will remember to add more later.

"Because you know what happens when you drink coffee, Ms. Walker"

I am also excited because I think Red Hong Yi's artwork will transition perfectly into a lesson about Vik Muniz (and Wasteland), which we can use a springboard to do some environmental awareness projects. Yes!

Thursday, August 6, 2015

#Reflect31 Day 5


My experiences and knowledge from being a student, educator, and teammate in different fields are all interwoven, like the crocheted blanket here. My goal as an educator is to be like the crochet hook; I strive to be an educator who empowers students to stitch together their knowledge and experiences. Sometimes our connections -- whether it be of knowledge, with people, or to other aspects of our lives -- can feel like the tangled knot of yarn here. It's important to remember that our students often feel this way, too. Untangling a knot is hard, but when we draw on our knowledge and support network, we can work through the knots and create masterpieces.


A teeny bit of insight into the symbolism pictured above:

  • The graduation pendant represents my own experiences as a K-12 student
  • The paintbrushes to represent art
  • The coin purse was a gift from my mentor teacher during my provisional teacher program
  • The book represents my training & experience in Higher Education (Marcia Baxter Magolda is my favorite Student Development theorist)
  • The roller skate wheel represents roller derby; my roller derby families have been some of the most supportive people in my life post-college
  • The background is a baby blanket that I am crocheting for the child of a friend from college

While I was editing the image above and adding text (on twitter I posted a version of the pic with the text in the image), my cat decided to take over my carefully planned display:

What a little knucklehead

Tuesday, August 4, 2015

Ms. Walker Makes: DIY Vanity & Organizers

Sometimes when I'm not teaching or lesson planning, I like to make DIY projects. I know I have found a lot of inspiration for my home decorating projects online (hello, Pinterest!), so I have decided to share my results and products... Starting with this nifty piece of furniture that I transformed last summer.


I moved back to NJ from Massachusetts, and in my new abode I needed a new way to store my shoes and makeup. The piece of furniture that I desired needed to have a narrow depth -- only about as deep as my foot is long -- in order to not block a set of drawers positions perpendicular to it. And it needed to fit under my window.

An old twin-sized headboard with shelves turned out to be the perfect base for this project!

I used the instructions from this blog post to paint and finish my my particle board/laminate headboard with great success! If you want to refresh some cheap furniture, this is the  method to use.

While the existing structure provides shelves for beauty products, I need to add some additional shelving for my shoes. Enter crates from the craft store!


I used L-shaped brackets and a power drill to attach an additional shelf inside of each crate, then had my dad (best dad ever!) cut a board of wood to rest on top of the crates for the long shelf.


Of course, having this awesome piece of furniture to hold my stuff was all well and good, but let's be real -- I also needed to be able to organize my cosmetics! This is where things got crafty...


I had already purchased a few rolls of cute-printed wrapping paper from the Dollar Spot at Target (Shoe boxes of supplies look much nicer when wrapped). I used some of the paper to wrap a clementine crate as my base container and a toilet paper tube (yep, keepin' it cheap) for eyeliner pencils. I had a few pastel mini Chinese food style take-out containers leftover from my cousin's bridal shower, which nicely held individual eye shadows & chap sticks. In my search for little open-top boxes, I found containers intended to hold sugar packets at Christmas Tree Shop. Throw in a couple glass jars, and I had a very accessible, useful way to store my makeup!


I've used this cute method of storing makeup brushes since college! All you need is a clear container (mine is a candle holder) and some plastic beads. [Shout out to RDs Treya & Janel from William Paterson University circa 2008 for teaching me this trick.] The organizer tray that holds my hair products & deodorant, etc. was from Michael's arts & crafts store.


So, of course, my vanity isn't always styled this neatly. I went minimalist for the photo shoot... my version of minimalist.

When I get a chance, my next DIY project to share will be my jewelry organizers! (Or maybe the hand-dyed duvet cover & curtains that I made last summer... we shall see.)


Wednesday, June 10, 2015

Advanced Art: Artist Statements

Choose TWO of the artists below. 
1. Go to their websites
2. Take a look at their work
3. Read their artist statements.

This will help you prepare for your Final Exam project, in which you will be making (or planning) a work of art based on a provided artist statement.


Guy Laramee


Leslie Wayne


Mike Kelley


Edward Burtynsky


Nuala O'Donovan


Nathalie Miebach


Julie Blackmon

Monday, June 8, 2015

REVIEW DAY!

Here are the resources for Review Day for our final exams!

striving not to make your life like this... at least not from art

Art IV:
Art History Digital Flash Cards
Memory Game (in class)


Art II:
Color Theory Digital Flash Cards
Printed Packet (available in class)
Quiz you can take at home: ProProfs.com (blocked at school)


Advanced Art: You will be creating works of art based on provided artist statements.
To review examples of work + statements from professional artists, see this post: http://cwalkerart.blogspot.com/2015/06/advanced-art-artist-statements.html

Your alternate option is to do a guided written critique, similar to your mid-term exam.
All additional resources will be provided in class.

Saturday, May 30, 2015

Art Criticism + Writing = Analytical Writing


If you teach in one of the states that used the PARCC exam this year, then you know that Analytical Writing is a big part of our students' standardized assessment now. Our students need to be able to prove their ability to:
  • cite evidence
  • analyze content
  • study & apply grammar
  • study & apply vocabulary
  • conduct discussions
  • report findings

Source: PARCConline.org

If you've ever held a formal critique or taught your students the skills of art criticism, you can probably already see how the "Analytical Writing" skills and art class can go hand-in-hand.

Behold... a fantastic TED Ed video that exposes the importance of Art Analysis:

How art can help you analyze - Amy E. Herman

Seriously... if your students don't start paying attention at the bit about bank-robbing ninjas with lasers, then I can't imagine how hard your job must be. But I digress...


It seems that most art teachers follow some version of Feldman's Model of Art Criticism, in which step two is even called "Analysis." If you're like me, you encourage your students to learn and use appropriate art-related vocabulary during critiques (for example, if a student says, "The yellow makes that shape pop," we discuss how the artist "used color to create contrast and emphasis"). We're only on Step 2 of the critique process, and we're already touching upon five of the six analytical writing skills listed above! Art Teachers: WE ARE CHAMPIONS!

Except maybe your students aren't writing... maybe your critique is verbal. Maybe you don't really want to have your students write essays. What can you do?

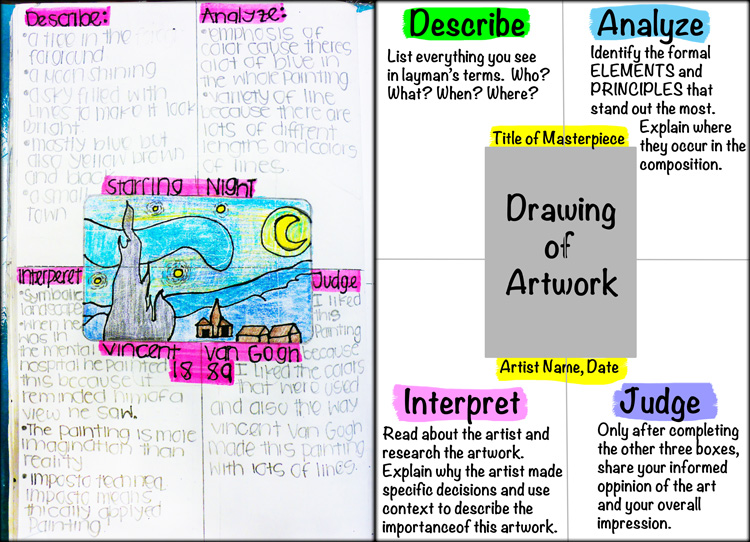
Example from Julia Sanderl's blog
One option is to grab this popular lesson (beautifully illustrated by Julia Sanderl and her students) and take it for a spin. I recently did, and I got some fantastic results!

Examples from my students at RMHS

My students have 90-minute blocks, so we were able to finish this assignment in one class period.

The handout I gave my students was actually a print-out of the "Feldman's Model of Art Criticism" pdf linked above, with Julia Sanderl's illustration and a short numbered list of instructions on the bottom. I found that my students got a bit confused about which set of questions to answer (the ones in the illustration, or the one at the top), and that some of the questions had wording that was too vague and caused additional confusion. At some point I will make an updated handout for my own future use, and I'll post a link here!

I think if students start using this process early, then writing a more in-depth formal analysis later (in the year or in their progression of courses) would not seem like a daunting task.

Another resource that I have found indispensable this year is this 5-page pdf by Mrs. K. Wood at Forsyth Country Day School. I used her document to create a "Guided Written Art Critique" packet, which served at the mid-term exam for my Advanced Art Students this year.


If you're in search of more resources about art analysis, I tend to gather all the neat stuff I find about critiques (and artist statements) on this Pinterest Board. Please send me your favorites!


P.S. The MOST BEAUTIFUL example of a sketchbook art analysis I have ever seen:

Click to visit the website where I found this analysis


Friday, May 29, 2015

Art II Color Theory Day 2 Activity (Friday 5/29)


You probably already know that colors can affect the way people feel and think. Today you will explore the emotional and psychological meanings of color.

You will work in groups of your choice – every student must be part of a group! No going solo today. Your group must have at least 3 members and no more than 6 members.

Each class must complete the assigned activity for ALL 8 COLORS listed below; you may choose to break into 8 groups, or each group may “study” more than one color:

Red
Orange
Yellow
Green
Blue
Purple
Black
White

Your Task: Work as a team to create one cohesive work of art that will instantly show the viewer what that color means. 

Your project should be predominantly monochromatic: you should use ONLY the color your group selected, but you can use tints and shades of that color (lighter values and darker values). I will also allow you to use variations of the hue (pure color), for example: warm green and cool green, perhaps some yellow-green, but no plain yellow!

You can use any media you like (mixed media is great), but remember we are almost out of red acrylic!

EVERYONE in the group must take part in the planning AND making of the project.

Please create a composition (arrangement) that nicely fills the entire page -- I don't want to see a tiny drawing awkwardly sitting in one corner.

HAVE FUN!

Please do the BEST job cleaning up that you've ever done in your life!

I will see you after the weekend!


P.S. Want to know more about how colors are viewed in specific cultures? Check this neat infographichttp://www.lifehack.org/articles/communication/colors-and-what-they-mean-around-the-world.html?bd=2015527

Tuesday, May 12, 2015

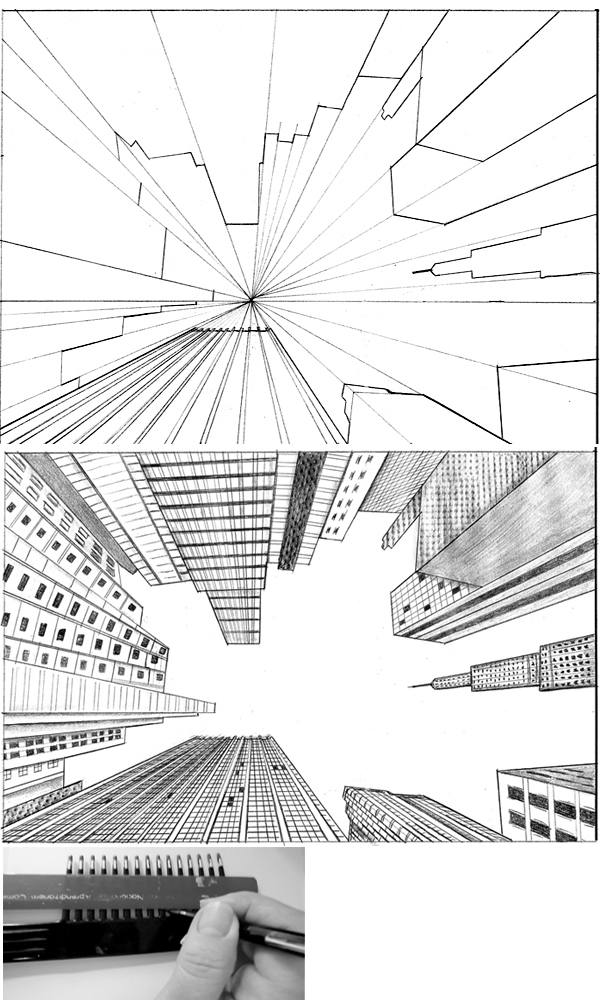
One Point Perspective: Project Resources

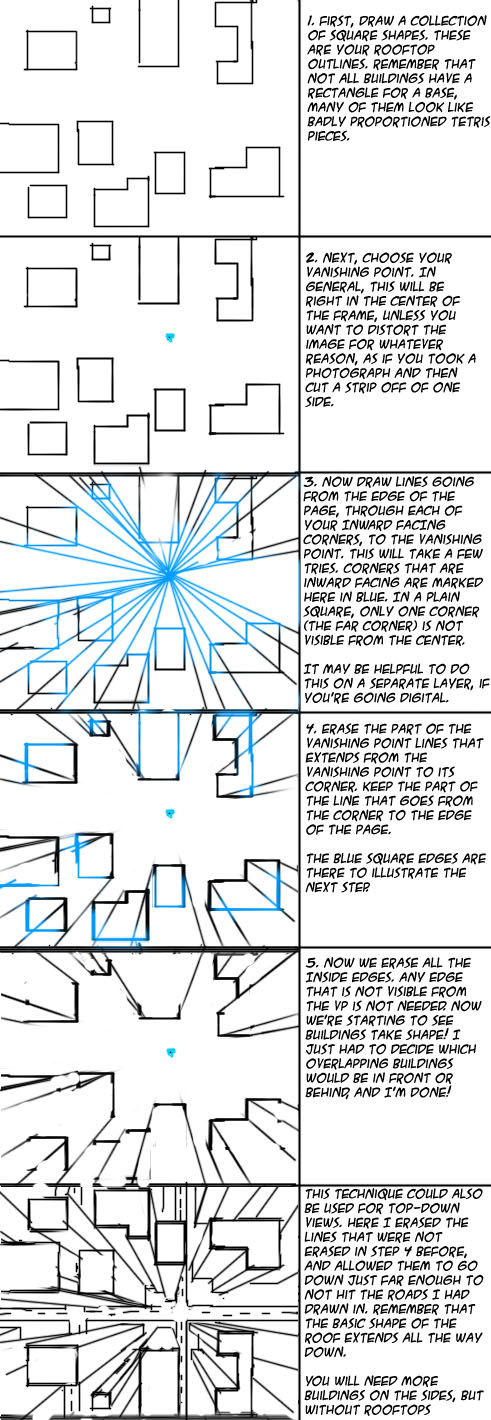
So you want to do a little extra something for your One-Point Perspective project? Awesome! Here are some helpful links:

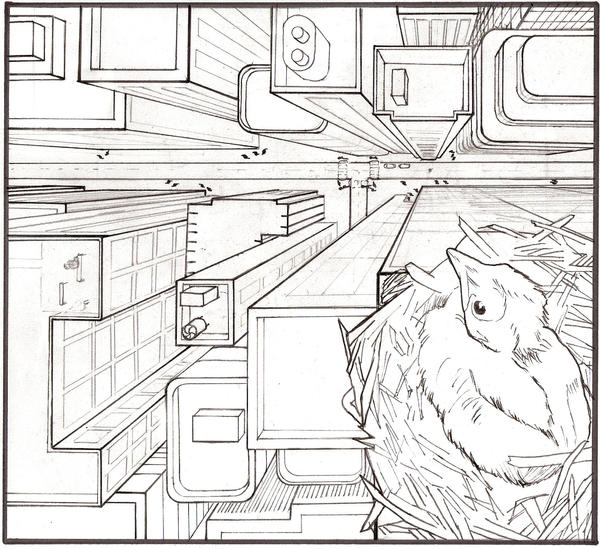
Draw a city from above (looking down at the street):
Swingerzetta on DeviantArt

Random student project example I found on Pinterest:

Random college level student example:
JessicaSlay on Deviant Art

Draw a city from below (looking up at the sky):
lamorghana on DeviantArt
Super cool project sample with circular border:
from "artcsara" on thesmartteacher.com
A 5-minute YouTube tutorial (I will make an exception to "no videos in class" for this, obvi):


Remember my tips:

  • Your street doesn't have to be the same on both sides
  • Your horizon line doesn't have to be in the center of the page
  • Your vanishing point doesn't have to be in the center of the page
  • Your street doesn't even have to be a street! Just use 1-point perspective!
Make something awesome!


Sunday, May 3, 2015

Beyond the complaint: Soliciting feedback from disgruntled students

The Art Show at RMHS is only three days away. And it's on the same day that progress reports are due. So as you can imagine, keeping up with a blog has not been a priority lately, especially since my students haven't needed it. But this idea behind today's post compelled me to write.

I am a leave replacement teacher in a high school this year. I have spent the past four years working in Student Affairs at colleges. I feel totally hashtag blessed to be teaching art again. While it's been an overwhelmingly joyful transition back into Art Ed, I do have to admit that (as with any first year at a new school, institution, or position), there has been a little bit of a learning curve. My mentor teacher and I share a classroom, which has been immensely helpful and enjoyable, and the administration at my school are some of the most professionally supportive folks I have ever encountered.

But I also have to admit that I've learned a lot about being a better teacher from my students. Maybe it's typical for teachers, or maybe it comes from my experience in Student Affairs, but I have found that some of the most impactful and helpful advice I've received as a teacher this year came masked as complaints from students. Yes, you read that right: complaints.

As teachers of millennial students (and now of the children of millennial parents), I think we often get distracted by what we, as a society, have come to view as "millennial entitlement." We write off our students as whiners and complainers; they are simply accustomed to complaining because they have been raised to believe that the barriers to their happiness and success shouldn't be so difficult to overcome. "Special Snowflake Syndrome" is something that my coworkers and I coined while working in Residence Life. Students who were consistently coming to meet with us for conduct-related incidents and knew the rules, but felt the rules shouldn't apply to them... those were the folks who seemed to suffer, because they believed they were special snowflakes in a way that defied reason.

I do have a few Special Snowflakes this year, but by and large, I've found that when I take the time to really listen to my students' complaints, to roll the ideas around in my mind and investigate all the facets, I can learn a lot from them. This has been especially true of students who have made the effort to voice their complaints to a guidance counselor or administrator. I have to say, the idea still instinctively makes me cringe; when a student complains about a teacher, bad things can happen. But that has not been my experience this year. The guidance counselor and administrators with whom I have worked this year took the time to create a safe space in which the students were able to more clearly articulate their concerns, which enabled me to find the pieces of the concerns that I could address in my classroom to benefit all the students.

And everyone lived happily ever after.

But the question now is this: how do I create that safe space in my own classroom, so that students do not need to resort to contacting other staff members in order to feel they will be heard? 

If you teach, I don't have to explain to you the difficulty. You have somewhere between 15 and 30 students in the room, many of whom need your help or want your attention at any given moment, and then you have Sally, who is clearly upset with the way something is going. What methods do you use to figure out whether or not that "something" bothering Sally is within your control? How do you break away from the chaos and make sure that Sally knows you're willing to listen and not just saying that you'll listen? How do you help Sally calm herself down so that she can give you something more than an angry rant? Even if Sally makes the effort to come speak to you after class or after school, the likelihood that she will be able to get your undivided attention isn't great (the art room has an ever-present buzz of early and late stragglers, as well as regulars hanging out until we lock the doors for the evening) -- how have you managed this?

I have some ideas, but I'd love to get feedback from other educators. I plan to compile some of the best suggestions here, So please share!


Friday, March 27, 2015

Art 4 - If you are missing something from Marking Period 3


If you need to make up one of the ONLINE POSTS, go here: http://www.ridgefieldschools.com/page/4145

If you need to make up a WORKSHEET, you can download it by clicking here

The MoMA's pages on Fauvism and Cubism can help you finish the worksheet


All of this is also available on our SchoolWires class page:
http://www.ridgefieldschools.com/Page/3865

Anything submitted before 6pm on Monday night (3/30/15) will be accepted for Marking Period 3.

Tuesday, March 24, 2015

Instructions for 3/24/2015

Ay Dios mio, folks. I hate being out sick.

Here are your instructions for today:

Period 3/4 -- I will still need to collect 2 "art-show ready" pieces on Thursday so that I can give you project grades for this marking period. I can help people choose and attach mats and mounting paper on Thursday, but try to do any touch-ups you'll need today.

Olivia - I did not get to flatten your canvas panel. If you want to do it (so that you can do the feathers next class) use one of Mrs. Neenan's spray bottles to wet the back of the panel (it doesn't need to be soaking, just damp), then put it face down on a piece of the thick, gray "blotting paper" and place the wooden box of reference photo folders on top of it.
Austin - I'm in love with the space man on your suminagashi. Definitely finish him for Thursday!


Periods 5/6 and 7/8 -- Many artists work in pairs and in teams. Since I can't be here today to start the Gesture Drawing unit, I would like you to take a cue from some of these team-oriented artists and do a single-day collaborative project or experiment with one (or more) of your classmates.

(Yes, Gorkem + Dean, as well as Haley + Marissa have already done this kind of thing in period 7/8... did you guys ever expect you'd be role models?) 

YOUR INSTRUCTIONS:
1. Pick a partner or a small group
2. Brainstorm together about what materials you want to use, what ideas/images/techniques you want to explore, etc. *Disclaimer: We are almost out of red acrylic paint*3. If needed, plan out who will do which tasks (delegate)
4. Create some artwork!
5. Optional: Check out the famous artist pairs below via your phones
6. Also optional: Help brighten my day -- email me pictures of the art happening in class! cwalker@ridgefieldschools.com

Pip & Pop

Pip & Pop used to be a team of 2 Australian artists, Tanya and Nicole. In 2011, Nicole left the duo, so now Tanya finds artist friends to help her make her vision as a solo artist come to life.


Christo & Jeann-Claude

Christo and Jeanne-Claude were a married couple who created giant environmental installations, beginning in the 1960s. Most of their famous works involved wrapping buildings or natural objects in giant sheets of (sometimes colorful) fabric.


The Bottom Line:
Even if your result doesn't look like anything awesome, I am hoping that you will learn something by spending a day *truly collaborating.* I know as well as you do that very often, group projects in other classes are more of a hassle than a fun learning experience... let's see how collaborative art can be different!


Monday, March 23, 2015

Instructions for 3/23/2015

I know, I know... I can't believe I am missing ANOTHER B-day!

But trust me, I'd much rather be with all of you today than be dealing with this dental emergency.


Here are your instructions for today:

Period 3/4 -- Please work on your Cubism/Picasso inspired projects.

  • You have free choice of media (same as last time), so get whatever supplies you need. **Disclaimer: we're almost out of red paint!** 
  • I expect to see progress made on your projects when I return! 
  • Don't forget to do an awesome job cleaning up (start at 10:59am)
Gioia - start by cutting out both of those large circles you traced last class and applying them to your canvas. From there you can probably start applying layers of color. Consider using small squares or ripped pieces instead of strips for the moon?
Angie - you have a good eye. Trust yourself.
Alex, Peter, John, and Brandon - get 'er done.


Period 5/6 -- Today is a "ketchup day" for your free choice projects (from before we started contour line drawing)!!

  • If you didn't finish your free-choice project, you can find it:
      • In the green paper folder on the paper cutter
      • In the portfolio folder labeled "B 5/6 not finished" to the left of the paper cutter
  • If you DID finish your free-choice project, please spend today doing something artsy and low-mess
  • Please do a STELLAR job with clean-up today! (start around 12:32pm)
Paul - if you have a covering teacher, ask them to log into the computer so that you can print the words you want to trace. If you have a sub, ask for a pass to go to a classroom where you know a teacher who will let you print. There should be a light-colored chalk pencil in the very front of my center desk drawer. You can use that to transfer the text. Lauren & Sebastian both used this method recently; ask them for a refresher if you need it.
Victor - produce something tangible to show me, even if it's just pages of experiments or sketches.


Period 7/8 -- I know that most of you did not start your Cubism/Picasso inspired project yet. PLEASE START TODAY.
 I expect to see progress when I return.
The main requirements are:

    • Your project should clearly "reflect some visual characteristics of" (look like) cubism or Pablo Picasso's work
    • Your project should be your own, unique design. Please do not copy someone else's project that you found online!
  • You have free choice of media (same as last time), so get whatever supplies you need. **Disclaimer: we're almost out of red paint!** 
  • For ideas & methods you can use, see this blog post
  • Do the greatest job cleaning up that ever lived (start around 2:36pm)
Benafsha - start designing your next project, or you can work on your assignment from Crafts class.

I can't wait to see you all on Wednesday. I miss you already!
P.S. Grades will be updated later this week.

Thursday, March 19, 2015

Tall Painting & Choice-Based Units

Choice-Based units are my new favorite thing.

While some students do well with very structured requirements for each class and each project, I'm definitely finding that the majority of my students are flourishing more (and getting more excited... and more cooperative) when they have the ability to set their own goals and design their own projects.


For any art teachers reading this: Here's a good article from The Art of Education about the "Choice-Based Spectrum" of art ed: http://www.theartofed.com/2014/12/19/where-are-you-on-the-choice-spectrum/

But THIS is what I really want to share:


Tall Painting - artist Holton Rower

I discovered Tall Painting while researching Process Art for my Advanced Art class. One particular student in my first-year art class seemed to need some inspiration for his "Free Choice" project, so I showed him the above video. He set about searching for advice and materials to build his own "hat" (as the structures are called) and diluting paint so that he could pour it.

A tall painting by Mike S. in progress

fresh, wet paint layers
The finished product is still not quite dry, but I know that some sections dried with much more interesting patterns than others, and I believe Mike is considering chopping up the project and working with the pieces, rather than displaying the entire thing as is, but we shall see...


And check out the variety of projects created during Art IV's Fauvism unit after introducing CBA:

Students working in a variety of media during a Choice-Based unit

The 10 images with green and purple borders along the top were chosen by students as examples of Fauvism they liked best.