Period 3/4 -- I will still need to collect 2 "art-show ready" pieces on Thursday so that I can give you project grades for this marking period. I can help people choose and attach mats and mounting paper on Thursday, but try to do any touch-ups you'll need today.
Olivia - I did not get to flatten your canvas panel. If you want to do it (so that you can do the feathers next class) use one of Mrs. Neenan's spray bottles to wet the back of the panel (it doesn't need to be soaking, just damp), then put it face down on a piece of the thick, gray "blotting paper" and place the wooden box of reference photo folders on top of it. Austin - I'm in love with the space man on your suminagashi. Definitely finish him for Thursday!
Periods 5/6 and 7/8 --Many artists work in pairs and in teams. Since I can't be here today to start the Gesture Drawing unit, I would like you to take a cue from some of these team-oriented artists and do a single-day collaborative projector experiment with one (or more) of your classmates.
(Yes, Gorkem + Dean, as well as Haley + Marissa have already done this kind of thing in period 7/8... did you guys ever expect you'd be role models?)
YOUR INSTRUCTIONS:
1. Pick a partner or a small group
2. Brainstorm together about what materials you want to use, what ideas/images/techniques you want to explore, etc. *Disclaimer: We are almost out of red acrylic paint*3. If needed, plan out who will do which tasks (delegate)
4. Create some artwork!
5. Optional: Check out the famous artist pairs below via your phones
6. Also optional: Help brighten my day -- email me pictures of the art happening in class! cwalker@ridgefieldschools.com
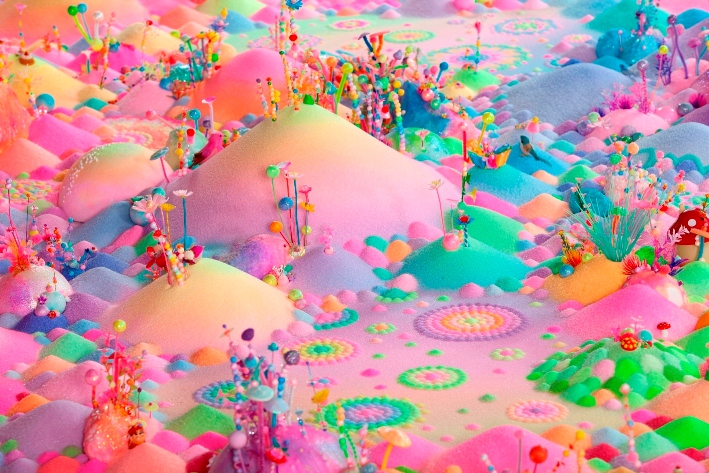
Pip & Pop used to be a team of 2 Australian artists, Tanya and Nicole. In 2011, Nicole left the duo, so now Tanya finds artist friends to help her make her vision as a solo artist come to life.
Christo and Jeanne-Claude were a married couple who created giant environmental installations, beginning in the 1960s. Most of their famous works involved wrapping buildings or natural objects in giant sheets of (sometimes colorful) fabric.
The Bottom Line:
Even if your result doesn't look like anything awesome, I am hoping that you will learn something by spending a day *truly collaborating.* I know as well as you do that very often, group projects in other classes are more of a hassle than a fun learning experience... let's see how collaborative art can be different!
I know, I know... I can't believe I am missing ANOTHER B-day!
But trust me, I'd much rather be with all of you today than be dealing with this dental emergency.
Here are your instructions for today:
Period 3/4 -- Please work on your Cubism/Picasso inspired projects.
You have free choice of media (same as last time), so get whatever supplies you need. **Disclaimer: we're almost out of red paint!**
I expect to see progress made on your projects when I return!
Don't forget to do an awesome job cleaning up (start at 10:59am)
Gioia - start by cutting out both of those large circles you traced last class and applying them to your canvas. From there you can probably start applying layers of color. Consider using small squares or ripped pieces instead of strips for the moon? Angie - you have a good eye. Trust yourself. Alex, Peter, John, and Brandon - get 'er done.
Period 5/6 -- Today is a "ketchup day" for your free choice projects (from before we started contour line drawing)!!
If you didn't finish your free-choice project, you can find it:
In the green paper folder on the paper cutter
In the portfolio folder labeled "B 5/6 not finished" to the left of the paper cutter
If you DID finish your free-choice project, please spend today doing something artsy and low-mess
Please do a STELLAR job with clean-up today! (start around 12:32pm)
Paul - if you have a covering teacher, ask them to log into the computer so that you can print the words you want to trace. If you have a sub, ask for a pass to go to a classroom where you know a teacher who will let you print. There should be a light-colored chalk pencil in the very front of my center desk drawer. You can use that to transfer the text. Lauren & Sebastian both used this method recently; ask them for a refresher if you need it. Victor - produce something tangible to show me, even if it's just pages of experiments or sketches.
Period 7/8 -- I know that most of you did not start your Cubism/Picasso inspired project yet. PLEASESTARTTODAY.
I expect to see progress when I return.
The main requirements are:
Your project should clearly "reflect some visual characteristics of" (look like) cubism or Pablo Picasso's work
Your project should be your own, unique design. Please do not copy someone else's project that you found online!
You have free choice of media (same as last time), so get whatever supplies you need. **Disclaimer: we're almost out of red paint!**
While some students do well with very structured requirements for each class and each project, I'm definitely finding that the majority of my students are flourishing more (and getting more excited... and more cooperative) when they have the ability to set their own goals and design their own projects.
I discovered Tall Painting while researching Process Art for my Advanced Art class. One particular student in my first-year art class seemed to need some inspiration for his "Free Choice" project, so I showed him the above video. He set about searching for advice and materials to build his own "hat" (as the structures are called) and diluting paint so that he could pour it.
A tall painting by Mike S. in progress
fresh, wet paint layers
The finished product is still not quite dry, but I know that some sections dried with much more interesting patterns than others, and I believe Mike is considering chopping up the project and working with the pieces, rather than displaying the entire thing as is, but we shall see...
And check out the variety of projects created during Art IV's Fauvism unit after introducing CBA:
Students working in a variety of media during a Choice-Based unit
The 10 images with green and purple borders along the top were chosen by students as examples of Fauvism they liked best.
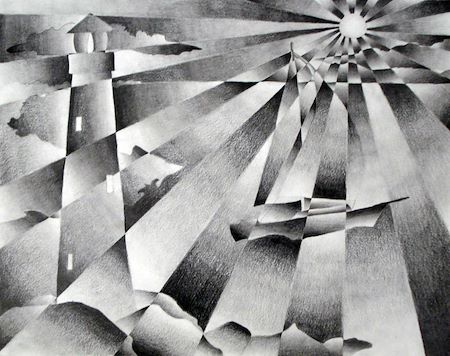
Draw an object or image, divide up the picture plane by tracing a ruler in many directions, then shade each fragment with a gradient.
Or variations of colors instead of gradients:
Artist: Emanuel Ologeano
If you think this looks difficult --- it's not! Here's a video tutorial about this method that was designed for first graders!!!
Another option: divide up the picture by tracing a stencil:
click either picture for instructions and samples
Make a cubist still life:
Here's a method in which you divide your paper first, then as you draw a still life, you translate (geometry term!) the object up/down/left/right a little bit so that the objects' edges don't line up at the divider lines:
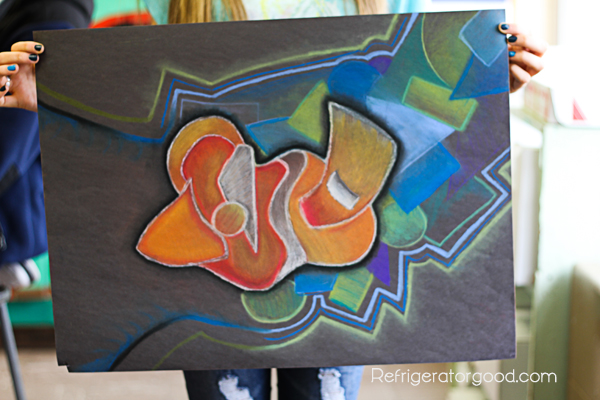
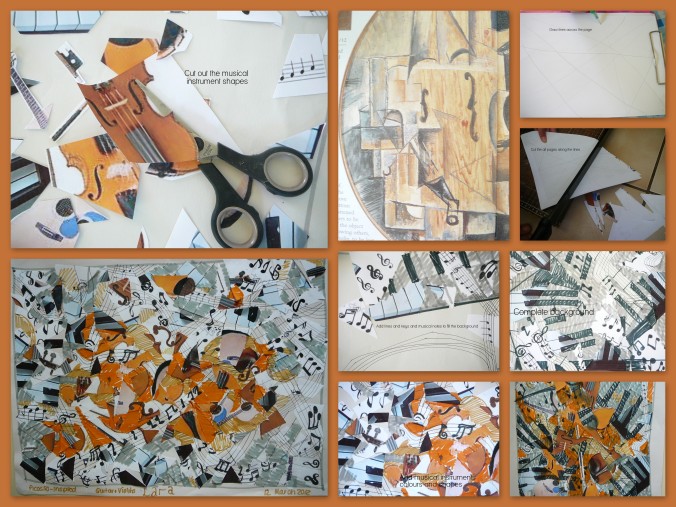
Music was a common theme in cubist artwork... you don't have to do a still life, you could also work from a reference photo of a musician, as these two students did:
This method allows you to work from a reference photo; you cut out and move around the fractured sections, then trace it:
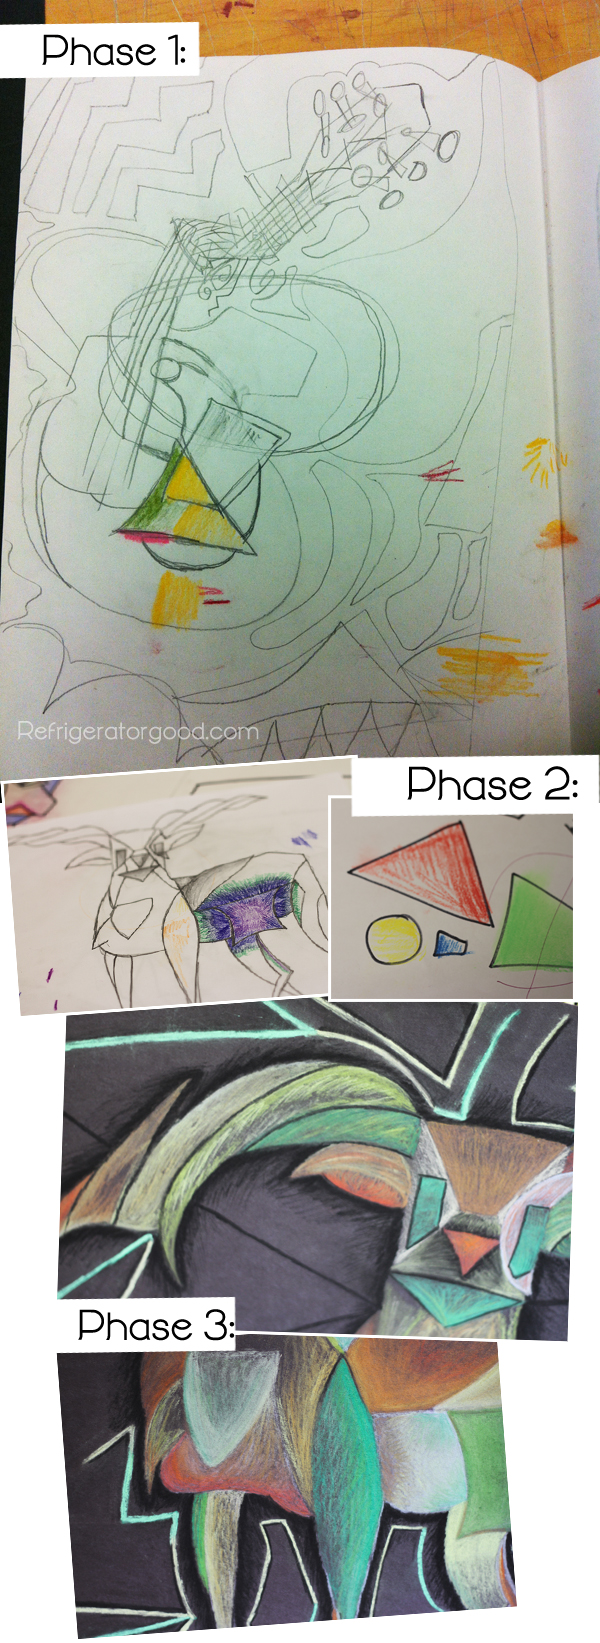
This teacher's project blends more use of your imagination and little bit less "rendering" (drawing to recreate something realistically/just as it looks in life or a photo)
"Phase 1: Students crate cubist style sketched from a photo or life.
Phase 2: Students experiment with oil pastels to create value
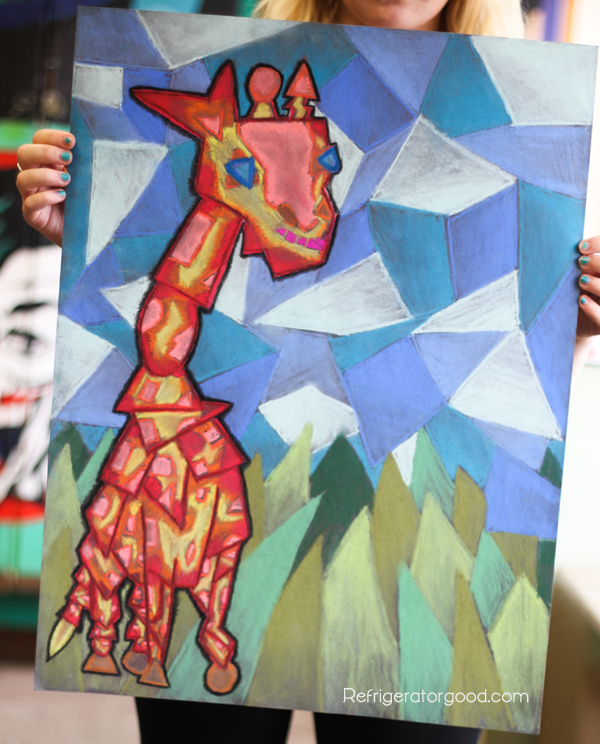
Phase 3: Sketches are transferred to large paper, the objective is that each square successfully incorporates value. BLACK is added for extra 'pop' and contrast."
Like this artist, you could use a relatively simple image from pop culture, replicate it overlapping itself in a variety of sizes, angles, etc.:
Other works by the same artist:
Yeah, this Tom Mervik dude is pretty awesome
Emulate a masterful work of art, but replace the subject (person/objects) with something that's meaningful to YOU! I like this style, which was inspired by cubism, but painted much later than the original cubists were working:
Samson Flexor, Self Portrait, 1947-48
Chop up your drawing, photos, printed papers, etc.!!! Collage them together: